
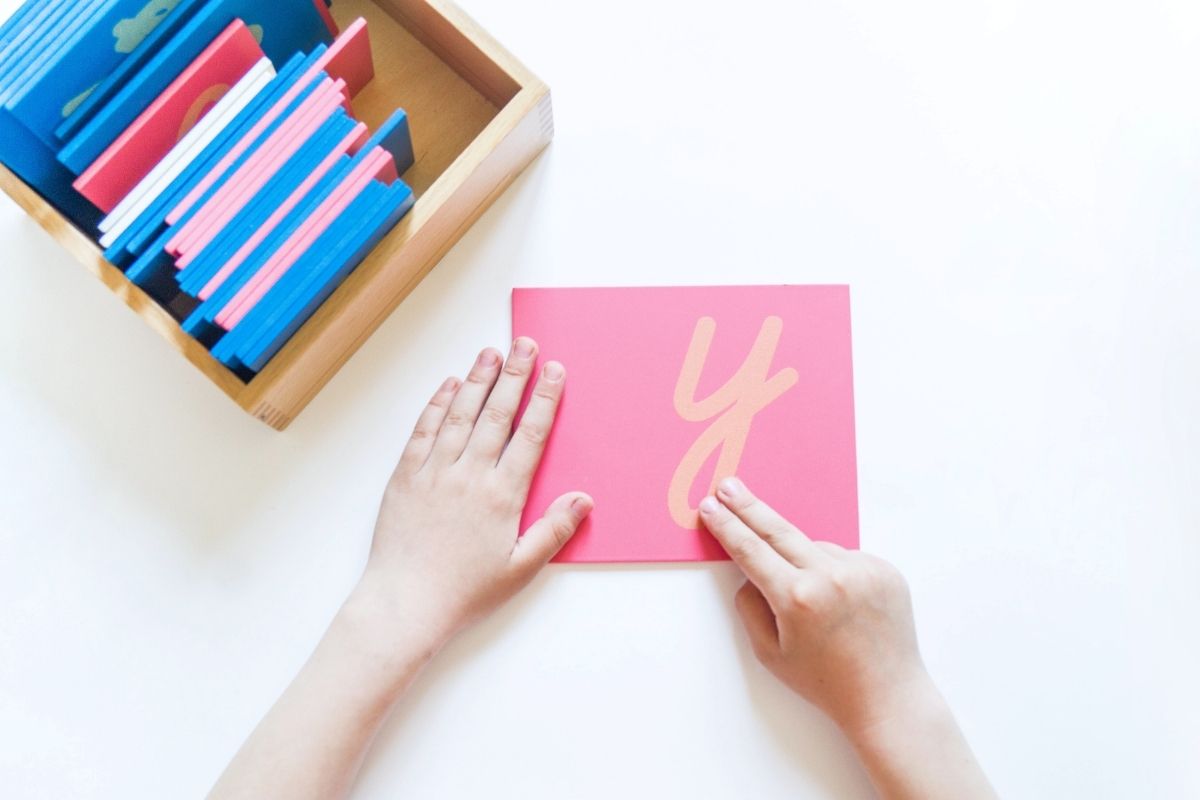
The easiest way to make sandpaper letters feel difficult is to place all 26 in front of a child and start asking questions. The material was not designed as an alphabet quiz. It gives one spoken sound a shape that the eyes can see and the fingers can follow.
At home, keep the first lesson tiny. Choose two or three clearly different letters, trace each one slowly, say its sound, and stop before your child loses interest. The full presentation is below, including what to do when they forget.
Do Not Start With the Alphabet
- Start when: Your child notices some beginning sounds in spoken words and shows interest in letters or writing.
- Present: Two or three letters at a time, not A to Z.
- Say: The sound first, such as /m/, rather than “em.”
- Trace with: The index and middle fingers of the writing hand.
- Lesson length: Usually 3 to 5 minutes.
- Next material: The movable alphabet once a useful group of sound-symbol links is familiar.
Montessori Language Material
Looking For A Ready-made Set With Clear Lowercase Letters?
This article includes Amazon links. If you buy through one, I may earn a small commission at no extra cost to you. I only link to materials that fit the lesson described here.
What Sandpaper Letters Actually Teach
Each card brings together three pieces of information: the sound, the visible shape, and the movement used to form it. The child hears /m/, sees m, and traces the same path the hand will later use when writing.
The material works best after some Montessori sound games. When the child already hears /m/ in milk and map, the textured letter gives that known sound a stable symbol.
Letter names are not forbidden. The lesson stays centered on the sound because that is what the child needs for word building. If your child asks, “What is this letter called?” answer naturally. There is no need to turn letter names into a secret.
Check Readiness Before You Bring Out the Cards
Age can give you a broad window, but observation is more useful. Some children are interested around 3, while others need more spoken-language play first.
The ear is beginning to separate sounds
Your child can notice the first sound in a few familiar words.
The hand can follow a short movement
They can trace slowly for a moment without needing to press hard or rush.
There is genuine interest
Your child notices writing, asks about letters, or enjoys sound games.
If none of these signs are present, put the letters away without concern. Keep reading aloud, talking, singing, and playing oral sound games. The material will still be there when the interest arrives.
Choose the First Letters Carefully
Alphabetical order adds no help here. The first group should be easy to tell apart by both shape and sound, with at least one vowel entering early enough for later word building.
These groups are examples, not a fixed universal sequence. English accents vary, children have different names and interests, and sandpaper-letter sets use different scripts. Use the sounds that are clear in your family’s speech and keep the same letter style across your sandpaper letters and movable alphabet.
The Three-Period Lesson, Word for Word
The three-period lesson moves from hearing the new information, to recognizing it, to recalling it independently. You do not have to complete all three periods in one sitting.
Period 1: Name the sound
Place one card in front of you. Trace the letter slowly with your index and middle fingers, following the writing direction, and say /m/. Invite your child to trace and say the sound. Repeat with the other two letters.
Keep the sound clean. Say /m/, not “muh.”
Period 2: Let the child recognize it
Mix the cards gently. Ask, “Can you show me /m/?” Then vary the movement: “Trace /s/,” “Move /a/ beside me,” or “Put /m/ at the top of the mat.”
Spend most of the lesson here. Recognition usually needs more repetition than naming or recall.
Period 3: Invite recall
Point to one letter and ask, “What sound is this?” Only do this when Period 2 has become easy. If your child pauses or guesses, simply say the sound, trace it once, and return to recognition another day.
Do not make the child repeat an error until it feels uncomfortable. The lesson is not an exam.
How to Trace Without Turning It Into Handwriting Practice
Tracing prepares the movement pattern, but the child does not need to copy the letter on paper afterward. Keeping the two tasks separate protects the light, sensory quality of the presentation.
- Sit beside the child rather than opposite them, so the movement is easy to copy.
- Use the index and middle fingers of the hand the child is likely to write with.
- Trace lightly and at a steady pace. Hard rubbing adds no benefit.
- Follow the same starting point and direction each time.
- Say the sound while the fingers move, not several seconds before or after.
- Finish after a few careful traces. Repetition should come from interest, not pressure.
Print, Cursive, and Color Choices
Parents often worry about choosing the “correct” set. Consistency across materials matters more at home than winning a script debate.
If This Happens, Adjust the Lesson
Most problems come from too many letters, a recall question given too soon, or a child who needs more sound work before symbol work.
When to Add the Movable Alphabet
You do not need to wait until all 26 letters are secure. AMI guidance describes introducing the movable alphabet once the child knows roughly half of the sandpaper letters and can analyze sounds in spoken words.
The next step is not a handwriting worksheet. The child uses loose letters to build words before the hand is ready to write them with a pencil. Start with the Montessori movable alphabet guide and printable, then use the first CVC word-building progression when your child is ready to compose short phonetic words.
Need the Full Language Path?
Questions Parents Ask Most Often
Should I teach uppercase or lowercase first?+
Lowercase letters usually come first because they make up most of the print a child will later read and write. Capital letters can be added naturally through names, book titles, and sentence beginnings.
How many letters should be on the shelf?+
The complete set can stay in an orderly box, but the adult chooses only two or three for a presentation. If the open display feels distracting at home, keep the box accessible but closed.
Can I make sandpaper letters myself?+
Yes. Use firm cards or thin boards, a clear lowercase font, and a texture the finger can follow without catching. Check every letter against your chosen writing style before cutting the full set.
A Letter Should Feel Familiar Before It Has to Be Remembered
The sandpaper letter lesson is small on purpose. One sound, one shape, one slow movement. When too many cards and questions are added, the child has to manage the adult’s plan instead of attending to the letter.
Choose two or three letters. Stay mostly in recognition. Let forgetting send you back one step without drama. The work is ready when the child is, and the next stage can wait until the sound and shape truly belong together.
Sources & References
- Association Montessori Internationale. Phonetic Approach to Language. Retrieved from https://montessori-ami.org
- Association Montessori Internationale. Sandpaper Letters: Beyond the Three Period Lesson. Retrieved from https://montessori-ami.org
- Bara, F., Gentaz, E., Colé, P., & Sprenger-Charolles, L. (2004). The visuo-haptic and haptic exploration of letters increases kindergarten children’s grasp of the alphabetic principle. Cognitive Development, 19(3), 433-449. DOI: 10.1016/j.cogdev.2004.05.003
- Montessori, M. (1912). The Montessori Method. Frederick A. Stokes Company.
- Montessori, M. (1949). The Absorbent Mind. Theosophical Publishing House.