

A baby can empty a real tissue box in twenty seconds, which makes the wooden sensory version look like an obvious purchase. Then many parents fill it with linked scarves, ribbons, bells and tiny toys, and the simple pulling activity becomes a busy bundle that is harder to use and harder to check for safety.
The tissue box is useful when it matches one clear stage: your baby is deliberately reaching, grasping and pulling. This guide shows how to test that readiness, choose safe fabric pieces, present the activity in three steps and decide whether a wooden box adds enough value over a DIY version.
Quick Reference
- Typical stage: Often from around 6 months, once the baby reaches accurately and pulls an exposed cloth on purpose.
- Real purpose: Practise reaching, grasping, pulling, releasing and later refilling.
- Start with: Three to six separate fabric squares, not a long connected chain.
- Best first presentation: Leave one cloth halfway out so the next action is visually obvious.
- Safety priority: No detachable decorations, long cords, buttons, bells, beads or fraying fabric.
- Worth buying when: The stable weighted box lets your baby pull with one hand and the activity is repeated often.
Is a Sensory Tissue Box Really Montessori?

It is better described as Montessori-inspired or Montessori-friendly than as a classic Montessori material. You will not find it in the original sequence of Children’s House materials in the way you find the Pink Tower, knobbed cylinders or sandpaper letters.
It does, however, fit several Montessori principles when used carefully. The action is real and visible. The baby causes the result. The material can be simple, orderly and limited to one main difficulty. It also allows repetition without an electronic response or adult entertainment.
The honest limit: A tissue box does not need a list of ten developmental promises to be worthwhile. It gives the baby a clear hand action and an interesting result. That is enough.
What Skill Is the Baby Actually Practising?
At around the middle of the first year, many babies become more deliberate about reaching for an object they want and bringing objects to the mouth for exploration. The tissue box turns that interest into a repeatable sequence.
1
Reach: Locate the exposed cloth and move the hand toward it.
2
Grasp: Close the fingers around a soft, irregular edge.
3
Pull: Coordinate arm movement with enough force to move the cloth through the opening.
4
Release and repeat: Let go, find the next visible edge and begin again.
5
Refill later: Push each cloth back through the opening, which asks for a different hand movement and more planning.
Does It Teach Object Permanence?
This claim is often repeated too broadly. When a cloth is already visible and the baby pulls it out, the object has not fully disappeared. The activity can support interest in containers, hiding and reappearing, but it is not a complete lesson in object permanence by itself.
By around 9 months, looking for a dropped object that has gone out of sight is one common cognitive milestone. Peek-a-boo, watching an object fall into a container and retrieving a partially hidden cloth all give the baby varied experiences with disappearance and return.
Better wording: The tissue box supports repeated container play and gives the baby experience with objects emerging from a hidden space. It does not independently create object permanence.
The Two-Minute Readiness Check
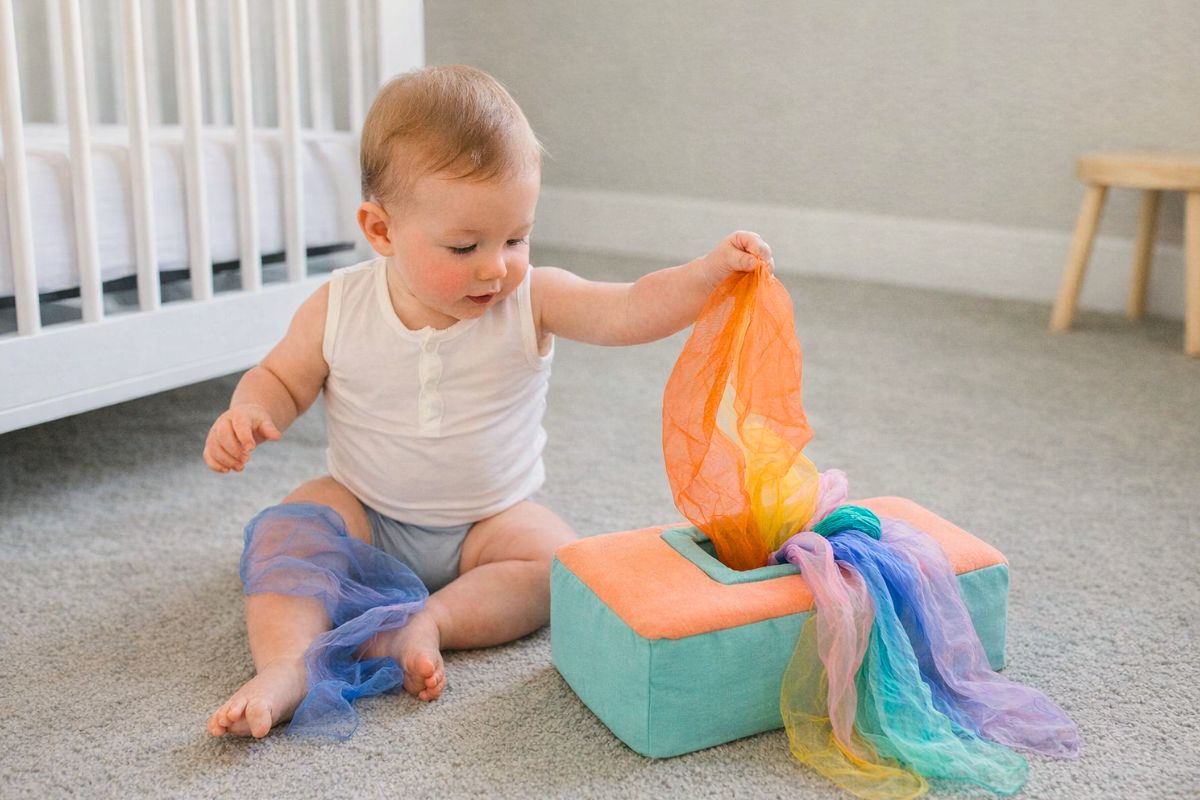
Age labels are useful for safety screening, but behaviour tells you whether the activity will make sense. Try these three checks with a clean washcloth.
Check 1: Deliberate reach
Check 2: Pulling action
Check 3: Short repetition
Only one check passes? Keep the washcloth available during ordinary play and try again in two or three weeks. Buying a box will not create the missing readiness.
Run This Safety Check Before Every Use
Babies at this stage explore with their mouths. That makes the construction and condition of every fabric piece more important than the number of textures included.
Six-Point Safety Check
- No small parts: No buttons, bells, beads, snaps, plastic eyes or decorations that can detach.
- No long connected chain: Keep cloths separate. Do not knot scarves into one long strand that can loop around the neck.
- No fraying edges: Use hemmed fabric or securely finished seams. Remove any piece with loose threads.
- Large enough pieces: Each cloth should remain far too large to become a small-part choking hazard.
- Stable box: The box should not tip sharply toward the baby’s face during a pull. All wooden edges and openings must be smooth.
- Clean and dry: Wash fabrics regularly and check that crinkle inserts or seams remain intact.
How to Make a Simple DIY Sensory Tissue Box
A purchased wooden box is not required to test the activity. A clean, sturdy container with a wide smooth opening lets you see whether your baby actually repeats the action before you spend more.
The best DIY test: Use the homemade version for one week. If your baby returns to it repeatedly and the light container keeps sliding or collapsing, a stable wooden box may solve a real problem. If the interest lasts one afternoon, you already have your answer.
Present It in Three Stages
Do not begin with a packed box and a long explanation. Make the next action obvious, then add difficulty only when the baby has solved the first version.
Stage 1: One cloth, halfway out
Place one cloth through the opening with a large corner visible. Hold the box steady, pull the cloth once slowly, replace it and wait. The baby only has one possible action to discover.
Stage 2: Three separate cloths
Place three individual cloths loosely inside. Leave the first corner exposed. The baby can repeat the same action without encountering a tied chain or a tightly packed mass.
Stage 3: Refill together
When the child begins placing objects into containers, show how to push one cloth back through the opening. Refilling is a separate challenge and may emerge months after pulling.
Buying a Wooden Box Versus Making One

One Ready-Made Option
The Montessori & Me version is listed for babies from 6 months and includes six washable fabric pieces in a weighted hardwood box. Its practical advantage over cardboard is stability. The activity remains the same, so test your baby’s interest first.
Disclosure: We may earn a commission if you purchase through this link. Product availability, specifications and price can change.
If Your Baby Loses Interest
What Comes After the Tissue Box?
Follow the action the child is repeating. If pulling remains interesting, offer a simple ring on ribbon fixed to a safe grasping material designed for supervised use. If containers become the main interest, move toward putting large balls into a wide container, removing objects from a basket or an object permanence box appropriate to the child’s stage.
The next activity is already visible in the current one. Watch whether your baby wants to pull, mouth, drop, transfer, fill or search. That repeated action tells you more than an age-based toy list.
Questions Parents Ask Most Often
Can I tie the scarves together so they keep coming out?+
Separate cloths are the clearer and safer choice for a baby. A long linked chain can create loops and introduces a cord-like hazard. It also changes the action from pulling one object free to dragging an unpredictable length of fabric.
Are crinkle tissues better than plain fabric?+
They add sound, which some babies enjoy, but the pulling skill does not require it. Check the internal layer and seams frequently. Plain hemmed cotton is easier to inspect and wash.
Can I use the tissue box during tummy time?+
You can place one exposed cloth within reach during supervised floor time. A full wooden box may be awkward for a young baby in prone position. Use the position that allows a successful reach rather than forcing the product into every activity.
How many fabric pieces should I use?+
Begin with one, then move to three. Five or six are enough once the baby repeats the activity. A tightly packed box adds resistance and visual clutter without adding a new skill.
The Short Version
Offer a tissue box when your baby is deliberately reaching and pulling. Begin with one large safe cloth, keep every piece separate and remove decorations, long loops and anything that can detach.
Test the activity with a simple DIY container first. Buy a wooden version only when stability solves a problem your baby has already shown you.
Sources & References
- Centers for Disease Control and Prevention. (2026). Milestones by 6 Months. Retrieved from https://www.cdc.gov
- Centers for Disease Control and Prevention. (2026). Milestones by 9 Months. Retrieved from https://www.cdc.gov
- Yogman, M., Garner, A., Hutchinson, J., Hirsh-Pasek, K., & Golinkoff, R. M. (2018). The power of play: A pediatric role in enhancing development in young children. Pediatrics, 142(3), e20182058. DOI: 10.1542/peds.2018-2058
- Association Montessori Internationale. From Attachment to Independence. Retrieved from Montessori AMI
- U.S. Consumer Product Safety Commission. Small Parts Ban and Choking Hazard Labeling. Retrieved from https://www.cpsc.gov
- U.S. Consumer Product Safety Commission. Strings and Straps on Toys Can Strangle Young Children. Retrieved from https://www.cpsc.gov
- Montessori & Me. Montessori Sensory Tissue Box: Product Specifications and Care Information. Retrieved from https://montessoriandme.us